miércoles, 24 de junio de 2009
martes, 28 de abril de 2009
domingo, 26 de abril de 2009
miércoles, 22 de abril de 2009
Preview video Mocho and Kruski
This is just the first preview of my project: Mocho and Kruski. The problem is that Kruski doesn't have the fur, because I cannot render it in this referenced file. Also the fur for the grass in the scene doesn't want to render. I have to turn them off, because if I try to render any fur it's going to take ages and then I run out of memory. What a pity! I went so far and now I'm stuck. Just waiting for some help. Or I have to get rid of the referenced files and do the animation again :-(
Room with Mental Ray
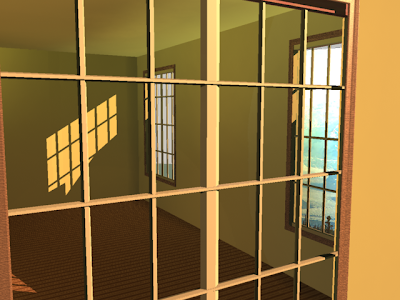
It's incredible how it works well. Not with Mocho and Kruski but with this simple room for example it's extraordinary. I still didn't find any solution to Mental ray in referenced files, I've post something on youtube to ask for help, anyway, this is some example of lights from a window. I can send the settings if someone is interested in.
martes, 21 de abril de 2009
Mental Ray, Fur and Ramps
viernes, 10 de abril de 2009
Mocho and Kruski
I'm actually working on a project that includes all the processes in an animation production, from modeling to rigging, binding, animating, lighting, rendering and of course, soundtrack. It's really hard to do everything from scratch and I'm following many tutorials, some of them I had to spend hours in order to acquire some skill. But it's so rewarding. I'm including one of the short scene of my project, this has to be refine, lights are missing and I have to render it in a proper way, this is just a preview.
jueves, 26 de marzo de 2009
lunes, 23 de marzo de 2009
Maya Girl - Hair
Ok, I've started to work with hairs and it's a lot of fun, you can create all sort of dynamic things and apply them to many different things, like collision objects or marine creatures.
Girl Hair
Girl Hair
viernes, 20 de marzo de 2009
Maya animation and rendering
This is my first try, I have animated the girl, just a very bad walking and then I've tried to render it.
I just have to understand where to adjust the resolution, because now it looks like very low resolution. And it's strange because I have put as setting : Production quality, and that's the best.
I just have to understand where to adjust the resolution, because now it looks like very low resolution. And it's strange because I have put as setting : Production quality, and that's the best.
viernes, 6 de marzo de 2009
Arms and Roll Fingers
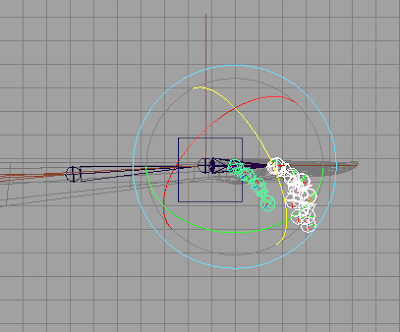 Roll fingers is tricky, as you have to set all axes in right position.
To animate them all the joints have to be aligned in the same direction.
The result is cool, they look like real fingers.
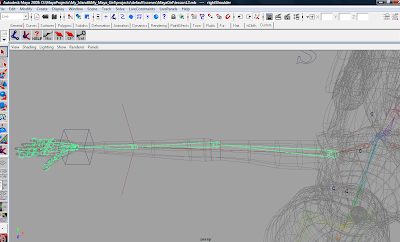
Also the arms are finished, the only problem there was the forearm, the effector have to be snap from the forearm to the wristle, in such a way that if you take the wristle joint all the arm can be moved.
sábado, 3 de enero de 2009
Girl Skeleton, Rigging
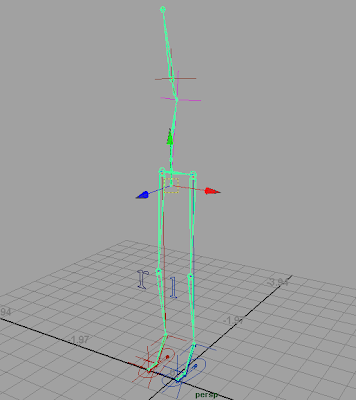
This is the skeleton of the girl.
I've started from the legs, adding joints and IK-handles from the hip to the ankles.
To control the foot I've added two simple circle shapes parented with the base of the foot. The foot can already been animated with driven keys. To achieve this I´ve added the attribute Foot Roll to the shape of the foot and settled the proper keys to simulate the movement of the foot when it moves.
To the knees there are two controls (r and l) to allow a more flexible movement of the knees, on the left and on the right.
I suppose this could have been achieved with ikRPsolver (ik rotate plane solver), but I´m not sure.
Then I´ve done the spine, adding clusters to make the selection easier and connecting everything to the root (the one I've selected with the move command).
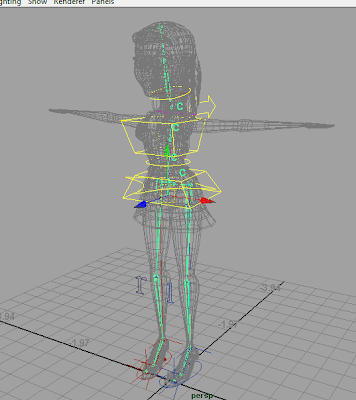
In this scene I've added six shape controls, each one is controlling one part of the body, but all the shapes are connected to the central one, in the middle of the pelvis.
So, this root one is controlling all the body, but each one can control its own part of the body. So I can rotate the neck, curving the back, rotating and moving the chest and so on.
When I try to animate it is really cool.
So now I have to go on with the arms and then I can finally bind the skin to the skeleton and watch the results.
sábado, 27 de diciembre de 2008
Hipershade Glass
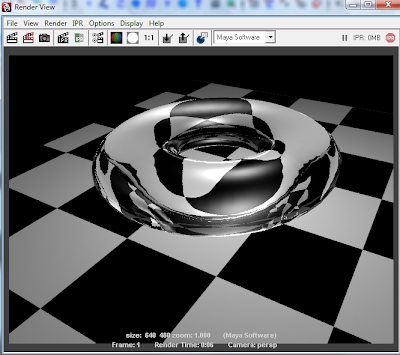
Sto cercando di riprodurre un bicchiere di vetro o di cristallo.
Per questo NURBS torus ho usato un Phong con massima trasparenza, aberrazione zero, c'e' da sottolineare que nei settings generali di Maya la opzione di raytracing quality e' disabilitata, quindi non funziona se non la abiliti prima (Rendering settings/Raytracing Quality).
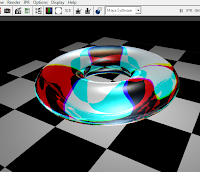
La foto seguente e' lo stesso oggetto con aberrazione cromatica.
Questo e' quello che spiega wikipedia dell'aberrazione cromatica:
"In ottica l'aberrazione cromatica è un difetto nella formazione dell'immagine dovuta al diverso valore di rifrazione delle diverse lunghezze d'onda che compongono la luce che passa attraverso il mezzo ottico. Questo si traduce in immagini che presentano ai bordi dei soggetti aloni colorati. È un difetto dal quale, in diversa misura, sono affetti tutti i sistemi ottici"
martes, 16 de diciembre de 2008
Spaceship animation
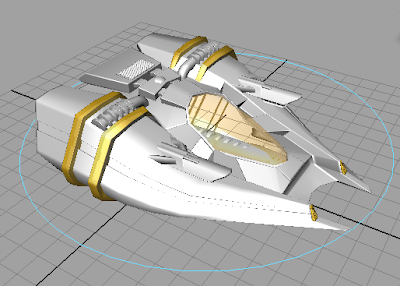 Now - my next project is to animate the Maya girl.
Before doing that, I'm making a basic study of animation trying to move this spaceship.
I've already done the classic animation from poitn A to point B to point C but actually I think this is just for unanimate models and I want something to animate parts of the models.
Anywaythis is a good start to take confidence with animation commands and it's really cool!!
domingo, 14 de diciembre de 2008
Maya girl textured
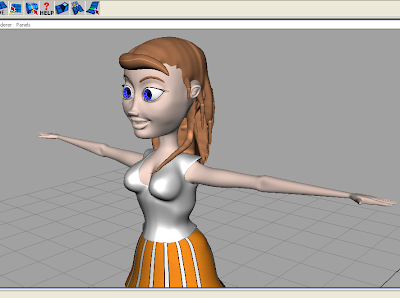
So, what I've learned today : how to make a ramp for the eyes (with stripes and blinn effect).
And how to manage texturing and material. A lot of work to do yet, there are thousands of things that I would like to know on modeling, 3d paint colors, material of course. But actually I would like to finish this and start to animate and render. Just to have a general view of the all 3D thing
Experimenting textures
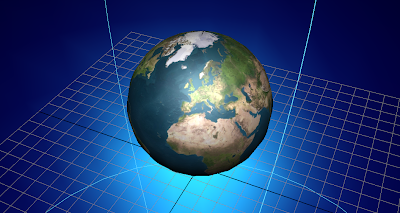 I've done this with UVs and texturing in photoshop.
Now I'm having troubles with the memory of this laptop, and of course more I will do, more I will get troubles.
I will try to double the memory and for the moment I hope it's going to be enough. When I will render and animate the model I will have big problems.
Today I've restarted the laptop 5 times, but the human model is almost finished.
Making puzzles with UVs is boring, but I believe there someone enjoying it. Anyway I refused to do it for the hair of the model, so I just gave her a simple brown color.
Looking forward for the ast lesson.
sábado, 13 de diciembre de 2008
Texturing
viernes, 12 de diciembre de 2008
Dressing
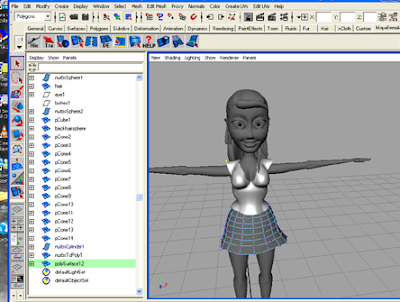 Today tapas in plaza Olavide and buying Christmas gifts, then I've finished the dressing of my Maya girl.
The shirt is a little bit strech and not modeled yet, but I didn't want to lose too much time with the dressing. I got how things work now.
To make it very cool I gave the shirt the blinn material. It's very lucent, maybe now I will refine it a little bit, but I'm very proud of this!!
Anyway the texturing is going to be my next task. The shirt is not going to stay like that.
I've done 6 lessons in few hours!!
Suscribirse a:
Comentarios (Atom)

